Mixing makes you and your beats more appealing to artists and listeners
It took me a long time to learn how important of a skill mixing is.
I was your typical pleb producer, saying things like:
-
“Mixing doesn’t matter, it’s just the sounds…”
-
“It’s just levels. You don’t have to learn how to mix…”
-
“Oh, the engineer will just do it…”
These aren’t inherent lies.
Sample quality is important; but mixing is how you get the industry style ‘punch.’
Leveling is the most important part of mixing (by far).
But that won’t get you far if you don’t even know that equalization is leveling by frequency (equalization is one of the most basic mixing concepts).
The engineer will take care of it - but only if:
-
Your trash mixed beat gets used
-
If the artist has a good engineer who’s willing to fix your trash mix
Why would you bet on people fixing or overlooking your lack of skill?
We talked about the music producer skill tree in the last newsletter.
Mixing is one of the best skill tree specializations you can have. It’s a skill you can learn, and it makes you more valuable as a producer.
What if artists don’t have to worry about the engineer fixing your trash mix because you did an amazing job?
That saves them time and money. And it helps them build trust in you (the engineer will love you too).
Mixing has many real world uses too. You can use it in many other ways than just beat making:
-
Movie & TV production (I’m looking to get into this)
-
Audio editing for podcasters and YouTubers
-
General sound design (For yourself and other producers)
The goal should be to learn to mix because it makes you a more valuable asset to all the musicians and creatives around you.
And remember: money, recognition, and success flow toward value (always).
Learning the fundamentals of mixing and practicing them in each beat you make will put you ahead of 80% of all producers.
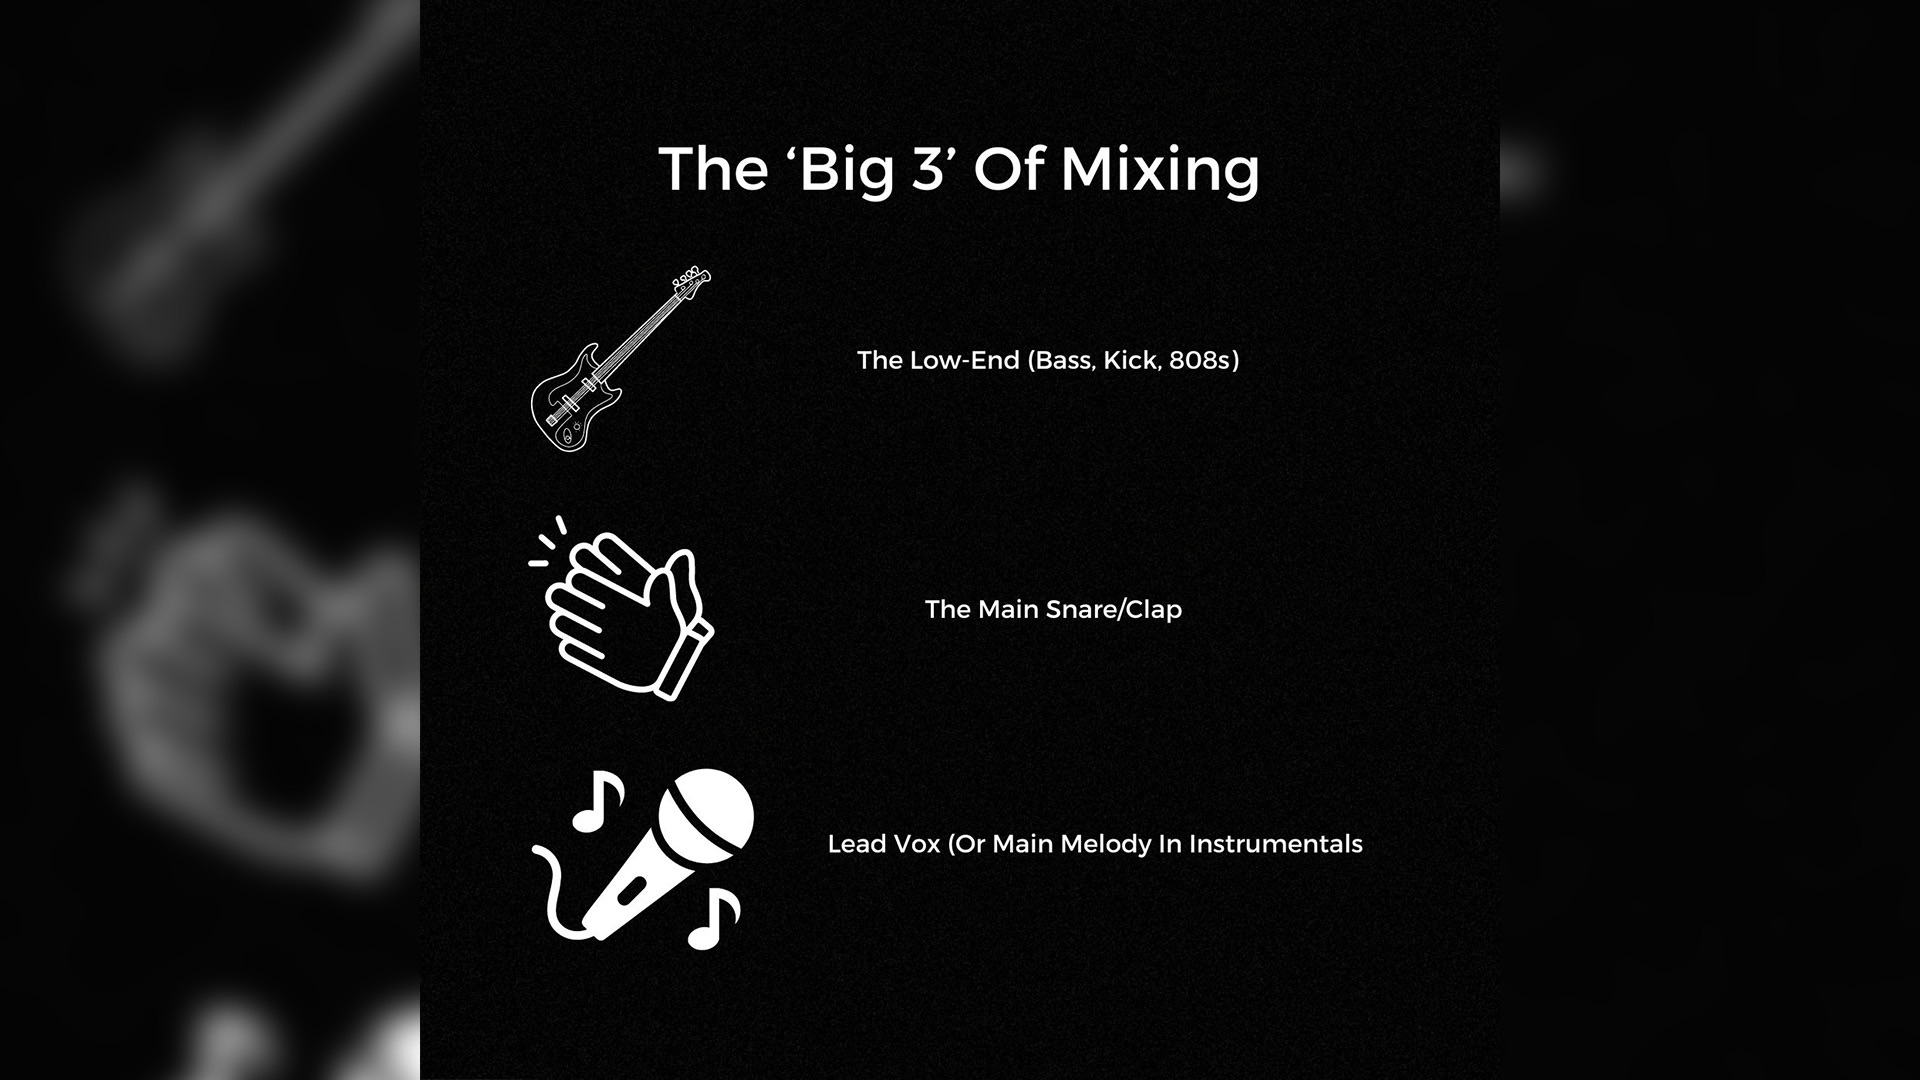
It starts with the ‘Big 3’
Understanding the ‘big 3’ is the key to a balanced mix. It helps your beats stand out to artists and listeners.
The ‘big 3’ of the mix are;
-
The total low-end (kick, bass, 808)
-
The main snare or clap
-
The lead vocal (if it’s just an instrumental, then this is the main melody)
This is based on a concept that my mixing mentor taught me.
I’ve never seen it mentioned anywhere else (which is a shame considering how much it has helped me).
The goal is to have these three elements of your mix be the most present out of the entire composition.
It’s important to note that “most present” does not necessarily mean loudest.
(although your low-end and main snare will usually be the loudest things, by gain level, in the mix - we address this below in the section on levels).
In order to understand how the ‘big 3’ plays into the full mix, let’s talk levels.
Defined levels vs relative levels
The first few mixing tutorials I made on YouTube gave specific decibel levels to put each instrument at.
“Level the melody between here and here.”
“Make sure your kick hits exactly here.”
To be fair, it worked.
And defined levels aren’t a terrible place to start as a noob production engineer (which I definitely was).
The issue for me was not understanding what the defined levels are actually for.
They aren’t for showing you how to mix your beat every single time.
They aren’t a quick fix.
Not a finesse.
Or a cheat code.
The defined levels, wherever you see them show up, are meant to demonstrate the relative relationship between various instrument groups.
That’s why every single professional mix engineer will tell you that there are no defined levels, because things change from mix to mix.
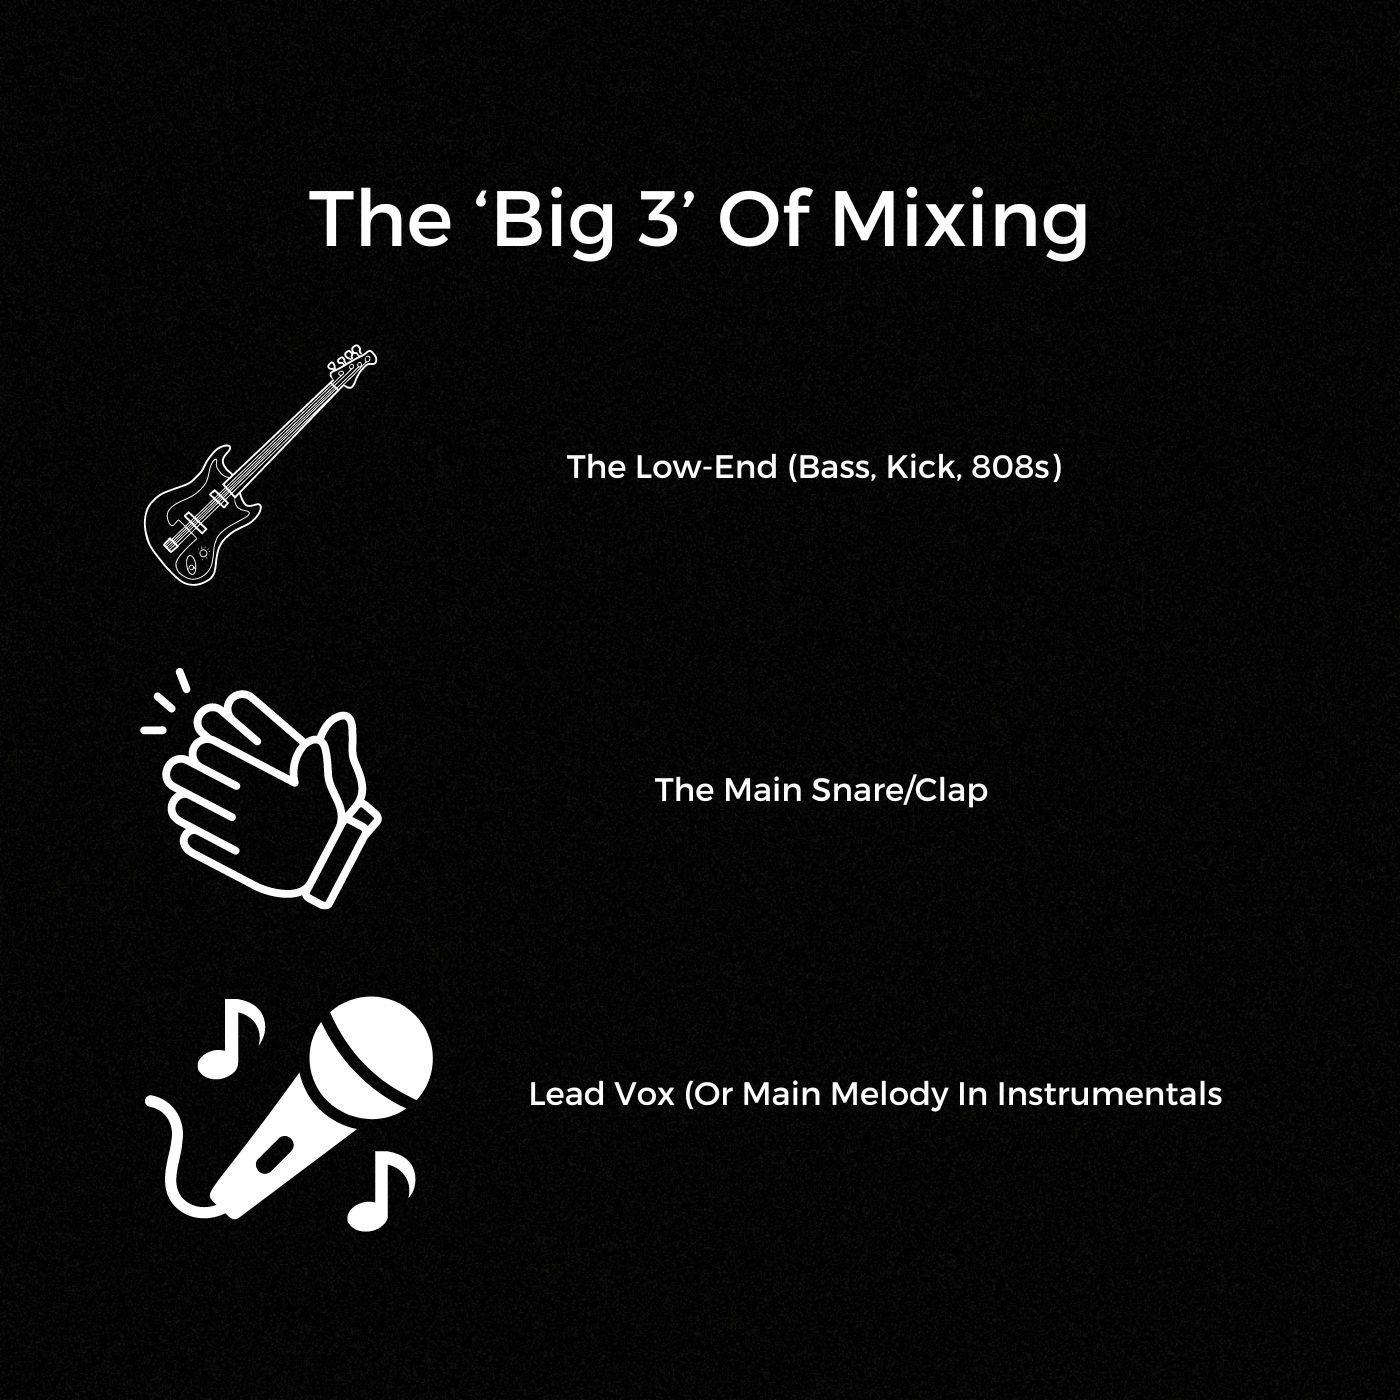
A general leveling workflow
My mentor taught me the following workflow for leveling beats. I should also mention that this workflow has gotten me all my placements and sales. Further, my mentor’s best students swear by this workflow (no, I am not even close to his best student).
Low end elements should be the loudest thing in the mix.
Ideally, the kick is the loudest.
Again, decibel amounts are not as important as understanding how everything needs to relate as a whole.
Just keep the concept of headroom in mind.
We’ll talk more about headroom in the next newsletter that covers mixing (let me know in the comments if you want that ASAP).
For now, it’s enough to say that you want to avoid your mix ‘metering’ (crashing against 0dB - which is the loudest it can be before you get digital clipping).
Next is your 808 (or bass).
This is slightly lower in gain than your kick. Based on our understanding of the ‘big 3’ we still want this to be loud and present.
After the low-end, comes the main clap or snare.
We want this to be loud.
But less in the amount of gain than any of the low end tracks/instruments. We want to think in terms of how loud the snare/clap is in relationship to the low-end we’ve already leveled.
Then comes the accenting snares (‘heavy’ percussive instruments).
Included here are:
-
Toms
-
Rims
-
FX (gunshots, stomps, etc.)
These get leveled lower than our main snare (again, we think in terms of relativity, not actual gain amounts - ‘feel’ the relationship).
Next are your ‘light’ percussive elements.
Included here are:
-
Closed hats (hi hats)
-
Open hats (cymbals)
-
Sharkers
-
Open
-
Triangles
We want these to have less presence in the mix than our main snares and ‘heavy’ percussive elements.
(there are exceptions, of course - this is just a good general guiding principle).
Finally, the melody.
This is the part where things get tricky.
Remember. Based on the ‘big 3’ concept, the melody needs to be one of the most present things in the mix.
The reason this workflow has it last is that melodies usually cover a wide range of frequency.
This makes them sound loud at relatively low amounts of gain (compared to the rest of your mix).
Another way to put this.
By actual gain amount, your melody will be close to the lowest (if not the lowest). But they’re perceived as being louder than your ‘light’ percussive elements (and even some of your ‘heavy’ percussive elements too). This is because of that wide frequency distribution.
We have to manage this frequency distribution in melodies. It’s not so much of an issue for individual drums tracks, especially in trap production.
But an untamed frequency distribution from the melody makes our mix sound muddy. This is because leveling happens not only by total volume. It also happens by frequency (EQ).
Equalization is the most important part of leveling (gain-staging)
Equalization is the gain adjustment of specific frequencies.
Another way of saying this is that EQ is leveling by frequency.
This is vital to understand.
If you don’t, there will be an entire phase of gain staging you aren’t paying attention to.
And, consequentially, it’s the most important phase.
Leveling by frequency gives you an extra dimension of control over your mix.
Equalization may seem basic, but mastering it separates boys from men in the world of music.
All the other fancy concepts;
-
Saturation
-
Compression
-
Distortion
-
Soft clipping
-
Brick wall limiting
-
Sidechaining
-
Spectral shaping
-
Transient shaping
Are just various manifestations of frequency management or manipulation.
So the best play is to get good at equalization.
It will usually solve most of your mix issues out right.
And even when it doesn’t, it will balance your mix better so there is less to fix with advanced engineering concepts.
(EQ helps you better understand those concepts too).
Check out this newsletter for a full guide on how I use EQ in my beats.
Here let’s address the most fundamental equalization techniques I use in every beat.
The habit of EQ’ing low end trash
This is one of the best things you can do to get your 808s and kicks to hit harder. We can use EQ to ‘move’ other sounds out of the way (preventing muddiness caused by frequency clashing).
One way I do this is by making sure that my console EQ is set to cut at 90Hz for any instrument or sound that isn’t a kick, 808, or bass. Like this 👇
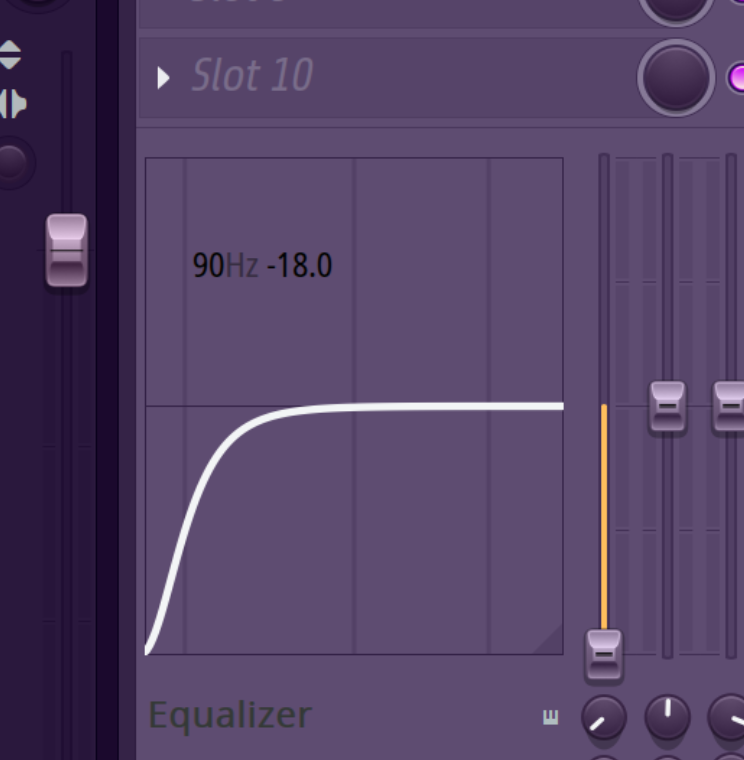
This leaves more frequency space for the 808 and kick, allowing them to ‘smack harder than ever believed possible.’
It’ll seem subtle, but your homies will definitely notice that your beats are hitting cleaner.
And this works because you are subtly but definitely reducing the overall volume of all low-end that is not your 808/kick. Mathematically speaking, this will always lead to cleaner, harder hitting 808s.
We take this a step further with a parametric EQ on the melody to tame the wide frequency distribution (it’s best to EQ up to the fundamental character of the melody).
Frequency masking (a deeper look at leveling by frequency)
Frequency masking is the main issue we aim to fix when we approach equalization from the perspective of gain staging.
“Frequency masking is an auditory phenomenon that can occur when two or more sounds sharing similar frequencies are played at the same time. In the range where the frequencies overlap, the louder of the two sounds will often partially or fully block out the competitor.” - Izotope (https://www.izotope.com/en/learn/unmasking-your-mix-with-neutron.html)
Frequency masking is why we use a parametric EQ to tame the frequency distribution of the melody. So that the lower frequencies in the melody to clash with and mask the frequencies of the 808.
Just like we want to turn down own instrument to make another more present when we’re leveling the mix faders.
We want to use bands on our parametric equalizers to turn down certain frequencies of the certain instruments.
This leads to a clearer and more balanced mix.
There are 2 kinds of frequency masking:
-
Encouraged masking
-
Problematic masking
An example of encouraged masking would be when the 808 and kick play together to cause a satisfying amount of clipping and/or distortion.
An example of problematic masking would be when there’s a guitar and piano clashing in the same frequency range. This makes it difficult to hear the best elements of either.
If this is the case, we study the frequencies where each clashing instrument is doing the most performance.
Then we adjust to this issue use one of two production engineering methods.
-
Structuring
-
Equalization
Fixing masking through track structuring
This is pretty straightforward. If there are 2 instruments/ tracks that are clashing, you can remove the issue by structuring them away from each other.
This is usually the best solution. Trying to fit all our instruments together leads to a cluttered sound no matter what you do (and is frustrating to mix).
If there’s a piano and a guitar in your beat that keep clashing, try saving one instrument for the bridge or intro of the track. This will usually be a better option than having them play together.
This saves you time and effort in trying to make them fit in the mix (guitar and piano usually perform in the same frequency range).
It has the added benefit of making your overall track more interesting.
Different instruments coming in and out of the composition will give it the perception of complexity (without you needing to do anymore production).
Fixing masking through frequency management & equalization
There are some cases where you won’t be able to fix frequency masking with simple structuring.
But there are other solutions to fix frequency clashes.
We can reduce the volume of one instrument in a specific frequency range in order to make the other more clear in that same area.
This gives balance to the mix when the 2 instruments are playing together in the mix.
This is done with a multi-band parametric equalizer. You can use automation to turn off the frequency cut when both instruments aren’t playing at the same time in the track.
I like using Neutron 4 to deal with frequency masking.
It handles everything in one step.
First, I open Neutron on the instrument that I would want to cut frequency for.
Then, I side chain the instrument that I want to trigger that cut into the track that’s receiving the cut.
Understanding the workflow is the most important thing here.
Neutron is being placed on the instrument whose volume we want to be reduced at a certain frequency.
Then we pick a track that we want to trigger that volume reduction (the one that we want to be more clear in the frequencies we’re cutting for the other instrument).
We do this so that the instrument triggering the reduction has more frequency and spectral space in the mix.
We take that triggering track and side chain it to the track that has neutron on it, that track receiving the frequency cuts.
Then we open the Unmask tool in Neutron, hit play, and adjust our parameters as we listen.
The gray line shows us the frequency distribution of our track, the instrument that will experience gain reduction.
The purple line shows us the frequency distribution of our side chain channel
The ‘side chain channel’ is the instrument that we want to sound clearer by triggering said gain reduction).
You can also set your frequency parameters.
‘Amount’ controls the total amount of gain reduction applied. It’s like the ratio knob on a compressor.
‘Sensitivity’ controls how aggressively or passively the Unmask tool reacts to the frequencies getting cut.
‘Attack’ controls how long takes for the full amount of frequency masking to be applied
‘Release’ controls how long it takes for the full amount of frequencies masking to turn off.
In all honesty…
Mixing isn’t something you do once and then master.
It takes dedicated practice.
Understanding the importance of the ‘big 3’ will put you way ahead of the pack.
From there, it’s a matter of how much you practice your leveling. Every producer has their own unique style (which is why relative levels matter more than defined levels).
You won’t find and refine your mixing style if you never do it.
Mixing is one way to make yourself more valuable as a music producer (so don’t ignore it).
Blessings,
Darth Chu
Get Sound Kits 👇